 I feel like board signs are cliche farmhouse attractions and I’ll not pretend I’m above them. I too find them so appealing. What is it about the clean type letters stamped onto a rustic wood sign translating meaningful passages that makes our shiplap and subway tile loving hearts skip a beat?
Maybe it’s because they are simple and yet profound.
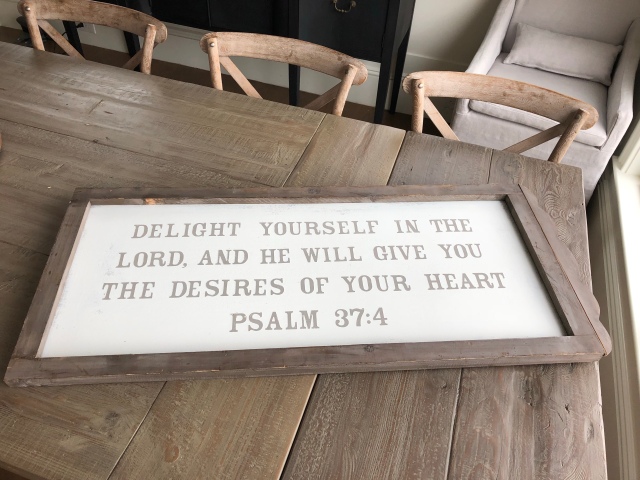
The Bible verse I chose for my sign has been foundational in the Mister’s life since he was young and has brought significance to our lives together. It’s our life motto in a way so I wanted to have it printed on a sign in our home.
After looking into buying one and realizing they are outrageously expensive, I made up my mind to make one.
Honestly, this was way easier than you think and it came out great if I do say so myself!
Materials:
- 1/4″ Plywood cut to preferred shape and size. Mine was 36″X15″. I bought and had the wood cut at Home Depot.
- Vinyl scrapbook stickers. I got mine at Target. I looked at Michaels too and while they had many more options, the size and font that I liked best was at Target.
- A chip brush or bristle paint brush.
- A darker undercoat paint. I used Annie Sloan French Linen chalk paint.
- A lighter finish coat paint. I used Magnolia Home Shiplap
- Sandpaper
- A frame of your choice
Here are the steps:
First step:
Decide on either buying or making a frame. The frame I had I found in a dumpster. Literally I will go dumpster diving for treasures. No shame. My boys already laugh at me. Wait until they’re teenagers.
There are some great tutorials on Pinterest for making frames from scrap wood or buying craft wood from Michaels.
Next:
Decide on the size wood board you need. I got 1/4″ plywood at Home Depot and had them cut the piece to the exact specification I needed. There is a guy (who I like to think is my new best friend) hanging out in the back of the store and if you ask they will cut any of the wood pieces (before you pay!) for FREE.
Once I got my board home and naptime was in session, I painted the board with a coat of Annie Sloan French Linen chalk paint that I had on hand. You will want to use a darker color because this will be the lettering layer that will come through the final coat of paint. 

I did two coats just to be sure it was a nice pallet to start with. Make sure the paint is completely dry before applying the stickers.
Next you need to layout what you’re board will read and where you want your letters. This part took the longest time. It probably took me longer than it needed to, but I wanted to make sure the spacing was even. Usually I eye-ball things and mostly I’m pretty accurate, but if this was off I knew it would drive me nuts to look at it. I divided the board into fourths and made a very light pencil line where I wanted my sentences to follow so they would be straight. I neglected to get a picture of this step, but basically I just took a ruler and measured 3 3/4″ from the top of the board for where the first line would go, another 3 3/4″ to the second line and the same spacing for the third line. Then I used the ruler to follow the straight lines across the board.
I cut out every letter and used them to layout the wording. It was a big waist of time. This is where I should have just gone with the old trusty eye-ball method. I did end up doing that eventually and it was much less fuss. They are stickers after all so you can move them as need be. It’s not difficult if you use the vinyl scrapbook stickers.


When the wording and spacing is arranged the way you like then it’s time to paint again. Use the same darker color as the base coat to cover the letters. This step is crucial to making sure the letters come out with nice clean lines. Using the same color and going over the stickers seals them and makes it so the paint doesn’t bleed through. Let the paint dry completely before the next step.


This time go over the letters with a lighter color. I used Magnolia Home’s new line of chalk paint “Shiplap”. Does Joanna Gaines do anything wrong? No. The answer is no. Except maybe that it’s a bit pricy, but again, I had it on hand from another project so that was helpful. I did 3 (ish) coats of the lighter paint over the letters to make sure the contrast would be enough. I liked the way the grey showed through around the edges though so I gave it some sparsely covered areas for effect.
I even let the kids help!


The hardest part is waiting for the project to dry enough to pull the stickers off. I waited just long enough that the stickers were still slightly damp from the paint, but the rest was mostly dry. Maybe an hour.
I used a safety pin to pull the sticker corners and pry them off. It took lots of patience because some of the stickers came of in several pieces but the lines were nice and clean!


Lastly I lightly sanded the board to give it a slightly more distressed appearance and added it to the frame I already had. I secured the board to the frame using tiny screws, but again you could use would glue for this step I’m sure.
Finished!


Now you too can make meaningful wall art that doesn’t break the bank, but looks amazing.

Let me know if you do one and how it comes out!
